I took some pictures and screen prints to make it clear.
For this example I used this piece of patterned paper:
To print this way you need Word on your computer. I'll explain this for Windows 2003 / 2007 because that is what most of you will have. If you need any explanation for Windows 2010, please let me now. It is not that much different, but you just need to know where to find what you need. My screen prints are in Windows 2010 though.
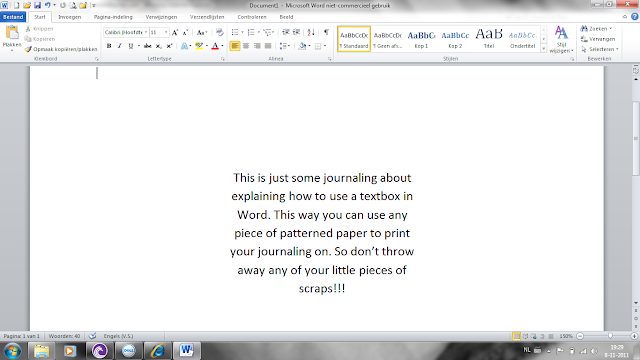
Ok, first you start creating a textbox in Word. You click 'Insert', then 'Textbox'. Click in the textbox that appeared in your screen, then go to 'Format', then 'Textbox' and then 'Size'. Measure the space on your piece of paper where you want your journaling and you add those measurements in the 'Size' screen. In this case it is 8cm x 5cm (sorry, my laptop is Dutch LOL). Then move the textbox a little to the middle of the page. This is what your screen looks like:
Type your journaling in the textbox and edit it any way you want with fonts, color etc. If your journaling is too long for the textbox, just simply down size your letters. Or make them bigger if your journaling is not long enough to fill up the textbox.
Now, you don't want that square to be printed on your paper, you just want the text. Click in the textbox, then click 'Format', then 'Textbox' and then 'Colors and borders'. Choose 'no border'.
Print this on some cheap printing paper.
Place your piece of patterned paper over the printed part (sometimes it helps to hold it against the window to see through) and adhere it with some scotch tape around the edges. Be sure that there is tape over every edge and corner of the patterned paper, so it won't get stuck in your printer. And be sure there is no tape on any part where your journaling will be printed. Later on you will see why....LOL sorry I did this one in a little hurry.
And there is your printed journaling.
As you can see, the last word is not completely printed because there was tape over it. But you get the idea.
I hope this will help you all with printing your journaling. Especially those of you who don't like there own handwriting, like myself.
If you have any questions, please ask!


Hey Danielle, thanks for taking the time to read my blog post, and also for taking it to the next level on your own blog. I also do it the same way in photoshop and customize spacing for pre made Journalling cards with lines and what not. I used to work in a scrapbooking store and had questions about my journalling all the time, so that is why I did the simple tutorial. Hope you will stop by again. Thanks
ReplyDeleteGREAT tutorial, love it!
ReplyDelete♥danni
TFS Danielle! Love your tutorial♥
ReplyDeleteThat's so funny that you posted this because I JUST figured that out yesterday on my own and I was about to post a tutorial about it too! LOL! ...Great minds!
ReplyDelete