Home

Friday, March 7, 2025

DT Stay Crafty with A Blog Named Hero challenge

Hello friends,

There is a new Stay Crafty with A Blog Named Hero challenge live today. This month's challenge is 'Mr. Postman: something you will mail in March'. This is quite an open-ended challenge, so there is no reason for you to not play along....and get a chance to win a $50 gift card to the Hero Arts store!

For my card I focused on a diagonal design and started by heat embossing the Positive Script Bold Prints background stamp with Gold Embossing Powder in a diagonal direction. I trimmed strips of Plum Cardstock in different thicknesses and glued them on my background, lining up with the background stamp.


On one of the strips I gold heat embossed a sentiment from the Smile Friend Stamp & Cut XL set. The 'friend' die is from this same sentiment set and I die cut it out of Plum Cardstock and Gold Cardstock and layered them.


It's your turn and I can't wait to see what cards you'll create to send out in March! You can play along for your chance to win and upload your cards here in the March challenge.

Thank you for stopping by and have a wonderful day!


Disclosure: this post contains affiliate links. I receive a commission when products are purchased through links in this post, at no extra cost to you. All products linked are the actual products I used in creating my projects. I do not share or review products that I would not personally recommend or use.

Thursday, February 27, 2025

DT Stay crafty with A Blog Named Hero challenge

Hello friends!

I'm back today with another card for the February Stay Crafty Challenge for Hero Arts. The challenge is to create a floral card. Keep reading until the end for the details on a great sales happening at Hero Arts right now!

For this card I used a card base made with Kiwi Premium cardstock and applied Hero Paste with the Holiday Foliage stencil. Some parts of the stencil are highlighted with Icelandic Hero Wax.

For the sentiment I used the I Love U stamp & cut XL set. I die cut the sentiment out of Azalea Premium cardstock and glitter cardstock. The smaller part of the sentiment is embossed with black sparkle embossing powder.


You still have a little time to enter your projects to the challenge for your chance to win.

Next I want to share with you a great sales happening at Hero Arts: Up to 25% off Letterpress and Foil products! Check out the systems, plates and more over here in the sales section. Now is a good time to stock up or to start giving Letterpress and Foil a try, if you haven't yet.

Thank you for stopping by and have a great day!


Disclosure: this post contains affiliate links. I receive a commission when products are purchased through links in this post, at no extra cost to you. All products linked are the actual products I used in creating my projects. I do not share or review products that I would not personally recommend or use.

Friday, February 7, 2025

DT Stay crafty with A Blog Named Hero challenge

Hello everyone,

I'm thrilled to share that I'm on the Hero Arts Stay Crafty with A Blog Named Hero Design Team for 2025! Hero Arts has always been one of my favorite companies in the industry and I'm proud to represent them with their monthly challenges, along with these talented ladies.


Today the February 'Build Me Up Buttercup' challenge went live and this month's challenge is all about floral cards.


I started my card by heat embossing the Poppy Field Bold Prints stamp with White Embossing Powder, which worked as a resist once I applied French Pink Reactive Glitz Ink.


I die cut the Ornate Gate Cover Plate three times out of Granite Hero Hues Premium Cardstock and glued them together to create more dimension. 


The sentiment is from the Hello There Stamp & Cut set. I die cut the first part out of Canary Hero Hues Premium Cardstock and sprayed it with Bright Yellow + Copper Two-Tone Metallic Spray. The second part of the sentiment is heat embossed with White Embossing Powder on Kiwi Hero Hues Premium Cardstock.

Now it's your turn, we can't wait to see your floral cards created with Hero Arts products. You can enter your cards over here for your chance to win!

Thank you for stopping by and have a wonderful day!


Disclosure: this post contains affiliate links. I receive a commission when products are purchased through links in this post, at no extra cost to you. All products linked are the actual products I used in creating my projects. I do not share or review products that I would not personally recommend or use.

Monday, August 19, 2024

Altenew - AECP Level 3 - All About Layering 7

Hi everyone,

I finished another class for AECP Level 3 and this time I did the All About Layering 7 class, which is all about layering with stencils. 

For the card I created I used the older Layered Dahlia Stencil Set that has beautiful details. I colored the layers with the Woodless Watercolor Pencils and I love how it turned out like a gorgeous watercolor painting. 


To add some texture and more interest to my card, I used a glitter paste with layer B of the stencil over the watercolor.


For the sentiment I used the Sentiment Strips stamp set. There are three different Sentiment Strips stamp sets available and I used the first one. You can also buy the bundle of three overhere.


Thank you for stopping by and I'll see you next time!


Thursday, January 18, 2024

Altenew - AECP Level 3 - Elements of Floral Composition

Hi everyone,

I'm back today with an AECP class that I did for Level 3: Elements of Floral Composition. This was such a fun class with lots of interesting elements. I actually ended up creating three cards for this class and I tried to get as many of the class elements as possible in each card. With the description of each card, I will briefly mention how I used the different elements of the class.

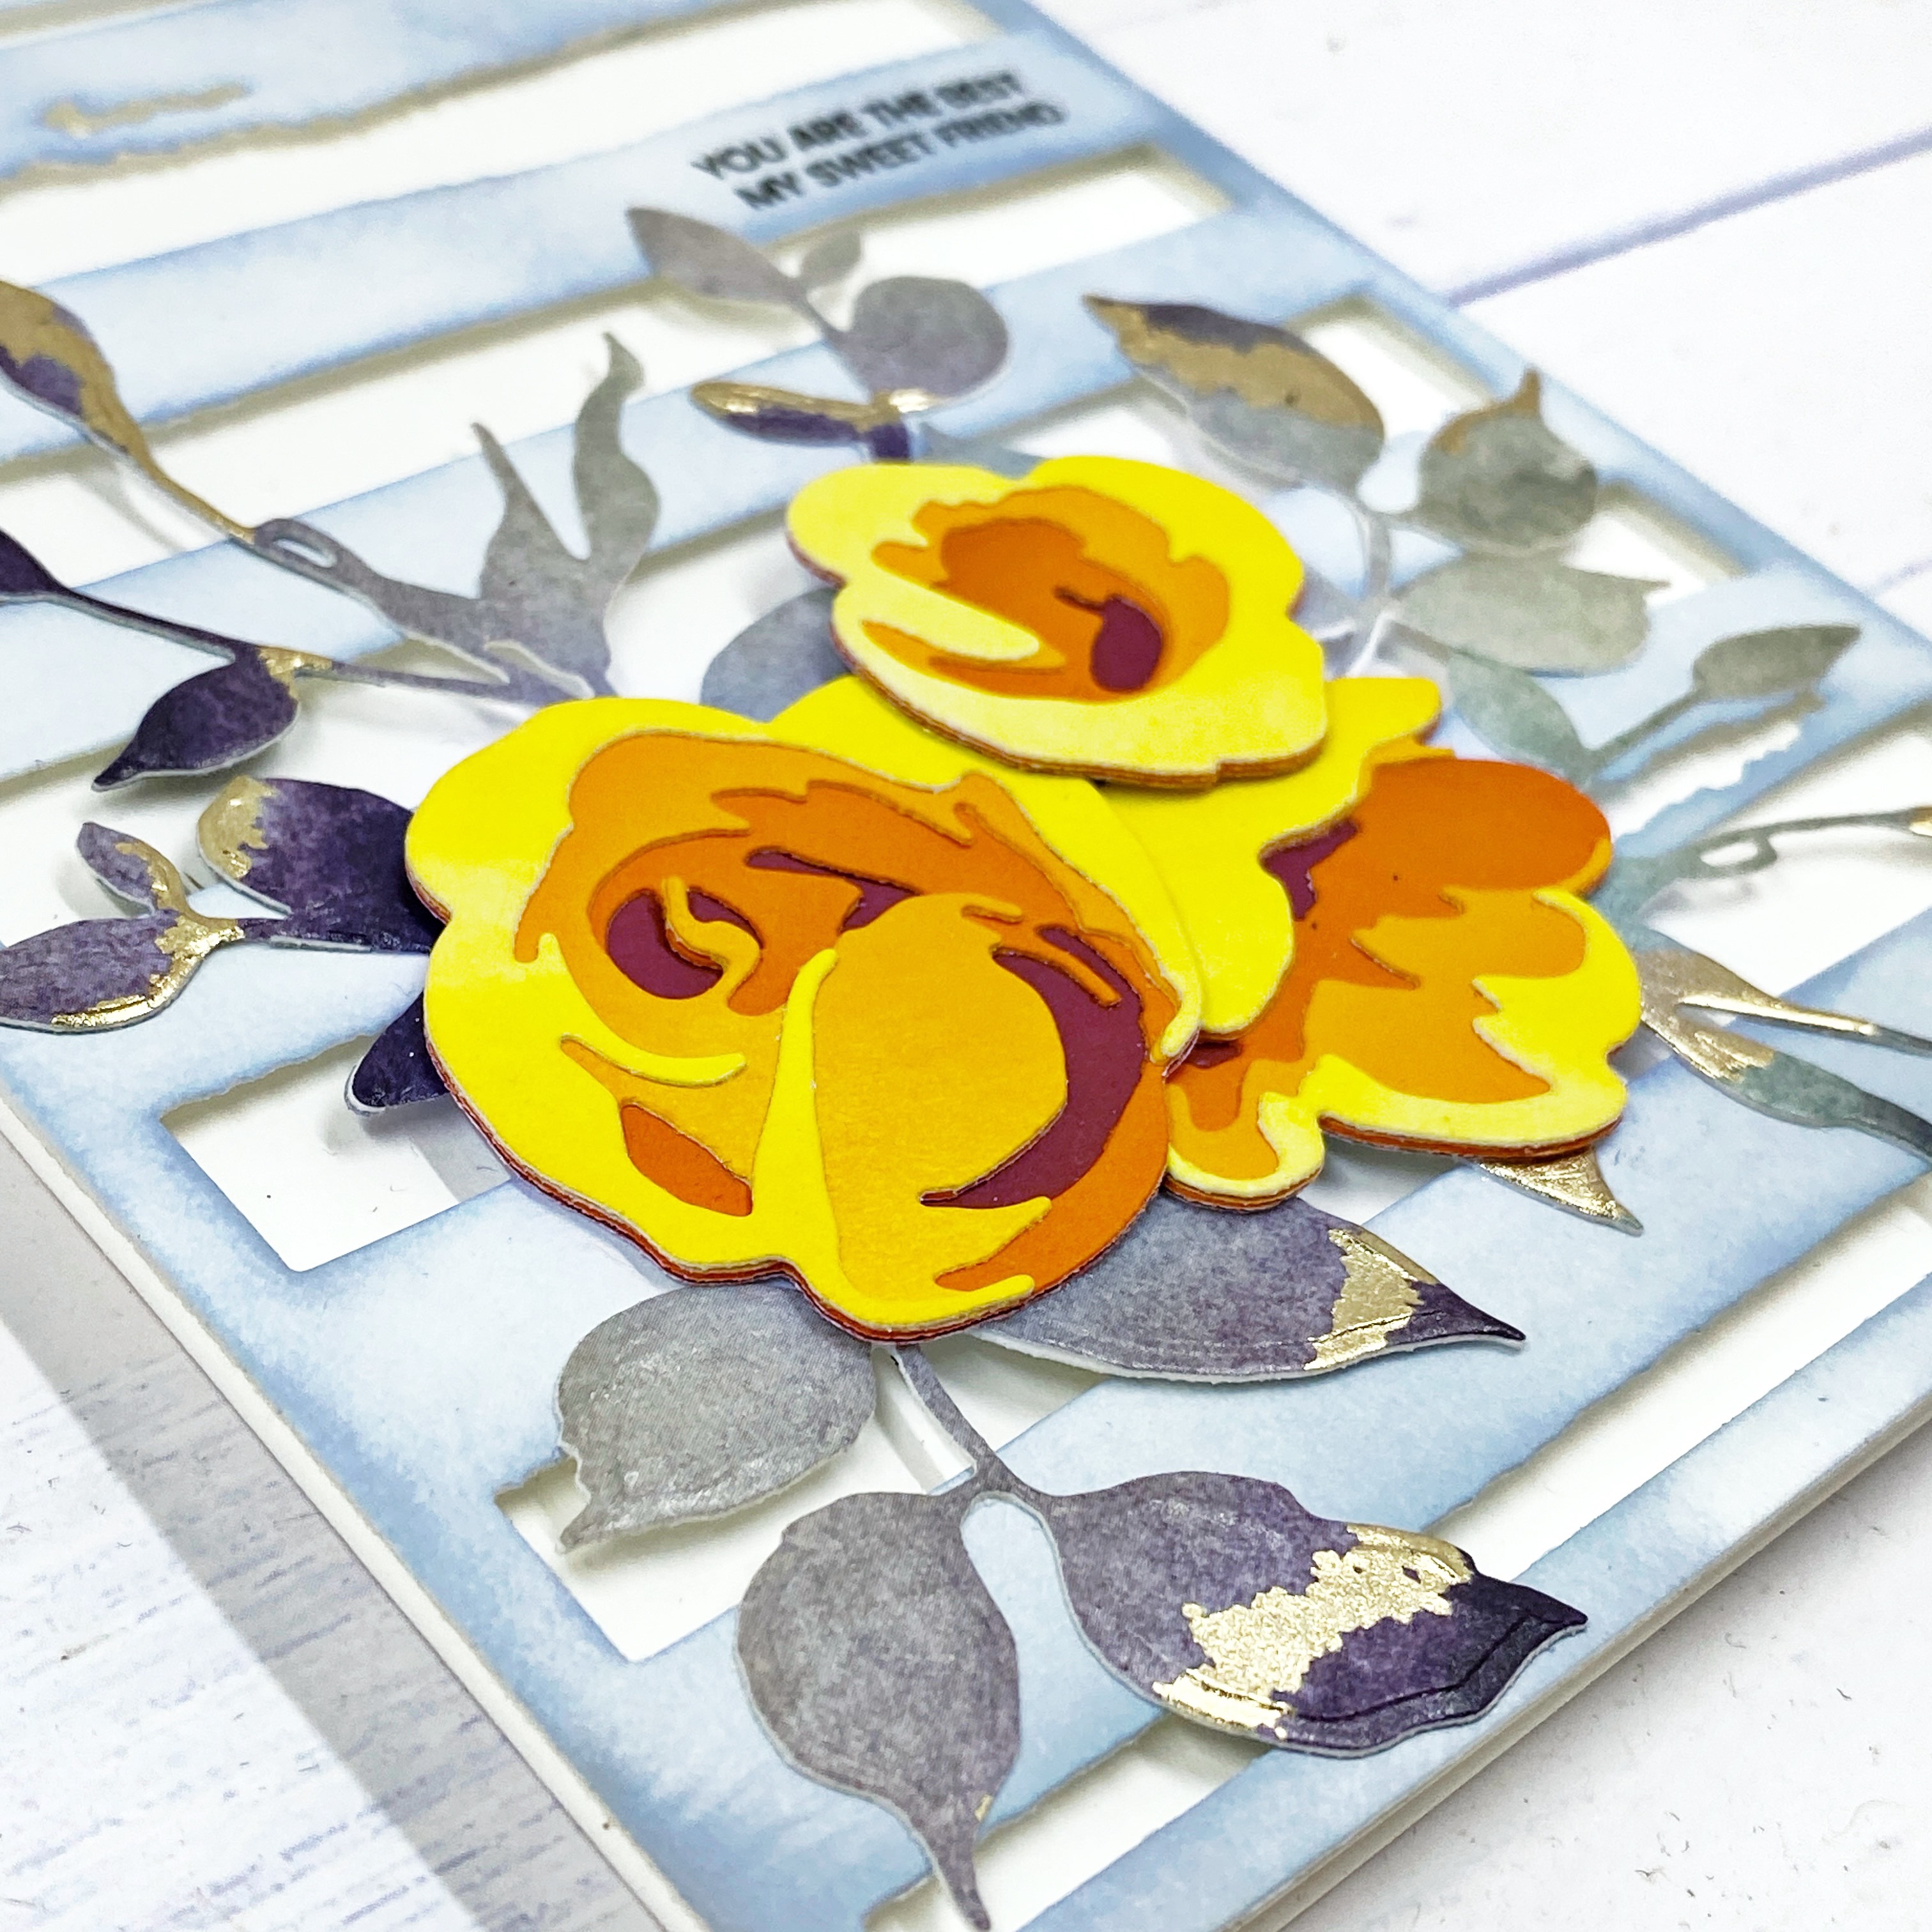
For my first card I used the Garden Picks 3D Die Set and die cut all the different layers from yellow, orange and red ink blended card stock. A fun idea I picked up in the class is to die cut the foliage out of washi tape, I used Gilded Ombre Washi tape. The background is the Watercolor Stripes Cover Die and I inked it up with some blue and grey inks. 

Color: 60% blues/greys, 30% yellows/oranges, 10% gold
Value: bright colored flowers and lighter toned foliage and background
Texture: 3D Layering Die
Form: Cover Plate adhered with foam tape
Space: rule of thirds


I created my second card with the Hibiscus Garden 3D die set and used a mix of pinks and reds for the big flowers and yellows and oranges for the small flowers. In the background I added a subtle detail with the Color Block Triangle stencil in light pink. As a finishing touch I added silver metalic watercolor splatters.

Color: 60% pinks/reds, 30% greens, 10% yellows/oranges
Value: brighter flowers, lighter foliage and stenciled background
Shape: triangle
Texture: 3D layering die
Form: foam tape
Space: rule of thirds


And last but not least I created a third card for this class. I started ink blending my background in a light grey, dried it and then used the same grey with the Vintage Tapestry stencil for a subtle detail in the background. This stencil has two layers and I added the second detailed layer with glitter paste. The flowers are from the Sweet Rose Bouquet stamp set.

Color: 60% greys, 30% yellow, 10% glitter
Value: brighter flowers, lighter background
Shape: circle
Texture: glitter paste
Form: foam tape
Space: rule of thirds


I highly recommend this class. Not everything was new to me, but I definitely picked up some new ideas and tricks!

Thank you for stopping by and have a great day!